
The ability to render 3D objects in the browser opens up many exciting possibilities for creating interactive experiences. Whether you’re looking for a new way to showcase products on your e-commerce site, creating stunning landing pages, or maybe even developing a game.
Since handling WebGL directly (JavaScript API for rendering interactive 2D and 3D graphics within any compatible web browser) can be complex, libraries, such as three.js, provide a simplified way to deal with rendering, animating, and interacting with 3D objects, while doing all the heavy lifting behind the scenes.
With that being said, three.js itself can still be a little overwhelming for developers who have never dealt with 3D before. Hopefully, this article will get you up to speed and present the necessary basis, that may assist you even if you’ll require more advanced features later on.
What does it take to render a simple cube? The reason why working with 3D for a web developer might be confusing at first, is that even a simple task such as rendering a cube requires some knowledge in 3D jargon.
If for instance, someone tells you, the web developer, to render a red box, I bet what you have in mind is “ok, I’ll create a div, use some CSS to size, place, and color it”. Pretty straightforward.
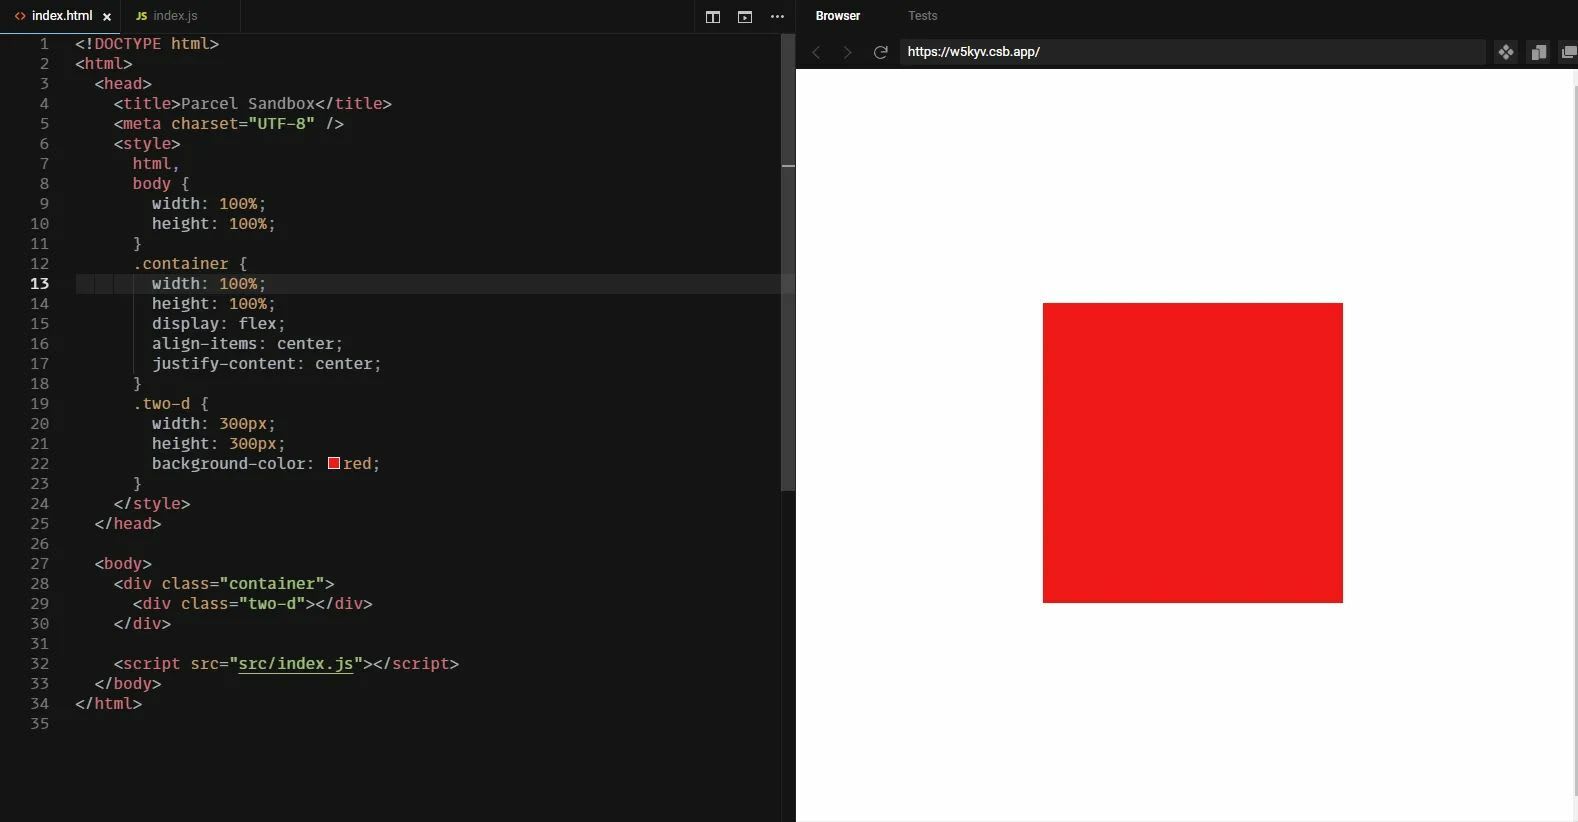
However, to do the same in 3D will require you to: A. Create something called a “scene” B. Define a cube geometry C. Create a material and attach it to the cube (to make it red) D. Create a camera E. Add lighting F. Tell three.js to render all that
The scene
In three.js, a scene is like a container that holds all the objects used to render our 3D image. Think about a theatre stage, where we place the actors, the set, and the lighting. In the same manner, we assign 3D objects and lighting to a scene.
// Creating a scene
const scene = new THREE.Scene();
const geometry = new THREE.BoxGeometry(10, 10, 10);
const material = new THREE.MeshStandardMaterial({ color: 0xff0000 });
const cube = new THREE.Mesh(geometry, material);

// Assigning a 3D object to our scene
scene.add(geometry);
const directionalLight = new THREE.DirectionalLight(0xffffff, 1);
directionalLight.position.set(0, 2, 10);

// Adding a light source to our scene
scene.add(directionalLight);
And just like we might have multiple stage sets in our theatre, each showing a different play, we can create multiple scenes and switch between them, or render them simultaneously.
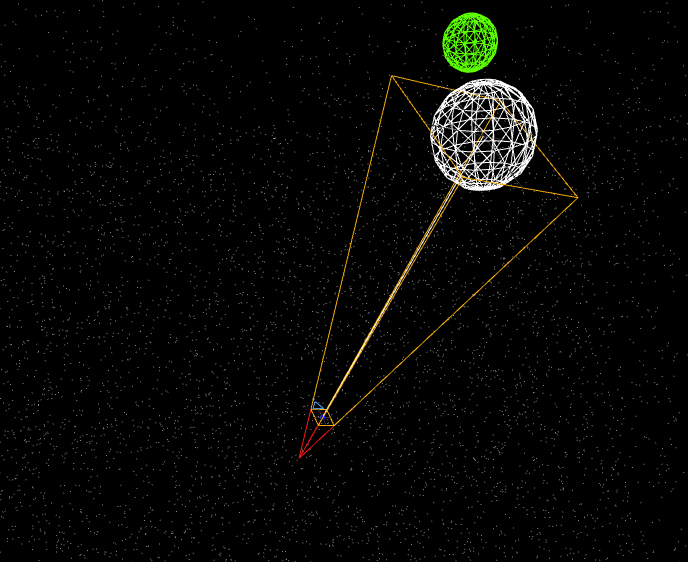
Source: https://threejs.org/examples/?q=camera#webgl_camera
3D geometry
A 3D geometry is basically a set of instructions for “how to create a 3D shape”. It consists of faces, edges, and vertices.
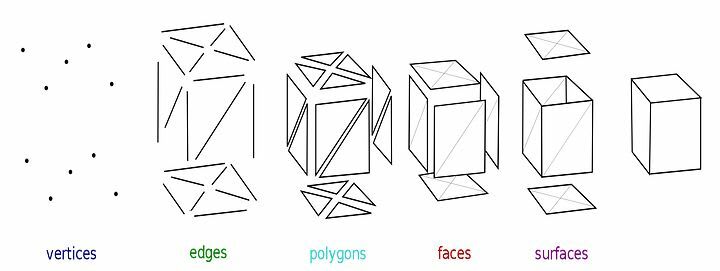
Source: https://en.wikipedia.org/wiki/Polygon_mesh
Luckily, three.js provides us with some built-in geometry classes, such as BoxGeometry, SphereGeometry, CylinderGeometry, and so on.
For example, to create a simple box, all we need to do is to provide the width, height, and depth. We don’t need to delve into the complexities of defining all the faces ourselves.
The size unit used in three.js represents meters, so 1 unit = 1 meter.
const geometry = new THREE.BoxGeometry(10, 10, 10);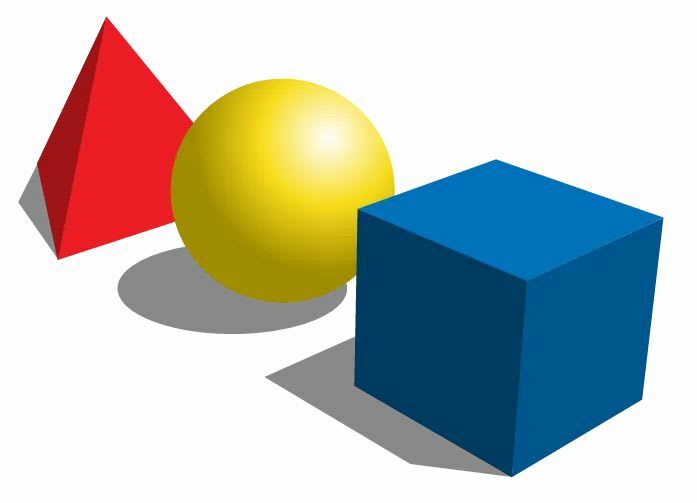
Source: https://en.wikipedia.org/wiki/Shape
In case you’re not happy with the existing geometries or need to create your own geometry classes, it is very possible. You can see some examples provided by three.js here.
Materials
Imagine holding two cubes in your hands, one made from glass, and the other from concrete. Both maybe have the same shape, but they look different and have distinct physical attributes such as reflectiveness, surface, and opacity.
In the 3D world, we use materials to define such attributes for our 3D objects.
With three.js we can either create our own materials with the built-in Material classes (such as MeshMatcapMaterial or MeshLambertMaterial), each has its own attributes, or load materials externally using MaterialLoader.
// A basic material, just coloring our cube red
const material = new THREE.MeshStandardMaterial({ color: 0xff0000 });
Texture maps are also worth mentioning. These are image files that can be used to define much more detailed materials, and make them look real. There are many types of texture maps, such as “diffuse map” which defines the colors, or the “normal map” which defines the surface of our object. Typically multiple texture maps are applied together. This great article explains each texture map in detail.
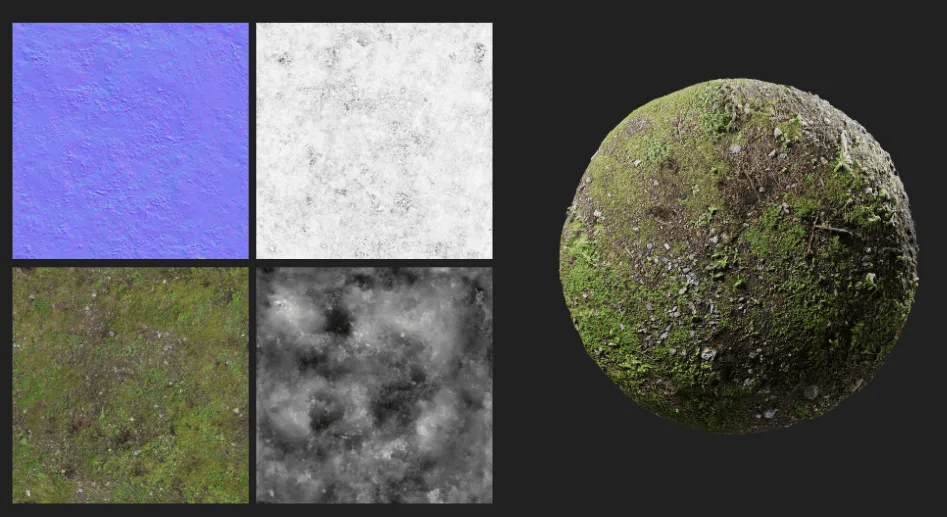 Multiple texture maps are used to define the realistic texture of a ball of grass and soil
Mesh
A mesh is an object representing part of the model. It contains a geometry and its material. A 3D model can be constructed from multiple meshes.
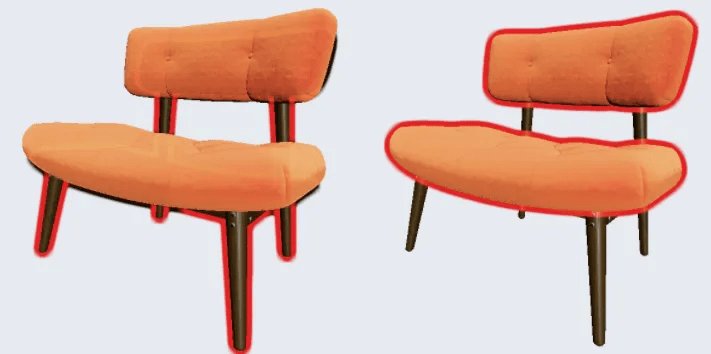
Each highlighted part is a mesh. All meshes combined define the model.
const geometry = new THREE.BoxGeometry(10, 10, 10);
const material = new THREE.MeshStandardMaterial({ color: 0xff0000 });
const cube = new THREE.Mesh(geometry, material);
Loaders
Sometimes we would like to import 3D models from existing files created by 3D modeling programs, and not create them from scratch. For that, we can use loaders, which are functions that are responsible for loading such files and converting them into three.js objects.
There is a different loader for each separate type of 3D file. For instance, loading a GLTF file would look like this:
import { GLTFLoader } from "three/examples/jsm/loaders/GLTFLoader.js";

const loader = new GLTFLoader();
loader.load(
	// resource URL
	'https://somesite.com/3dmodels/fox.gltf',
	// called when the resource is loaded
	function ( gltf ) {

		scene.add( gltf.scene );
	},
	// called while loading is progressing
	function ( xhr ) {

		console.log( ( xhr.loaded / xhr.total * 100 ) + '% loaded' );

	},
	// called when loading has errors
	function ( error ) {

		console.log( 'An error happened' );

	}
);
Did you notice that the GLTFLoader class is not imported from the “three” packages directly but from some mysterious “examples” folder? This is because loaders are not part of the core three.js library, but an extension. Despite the misleading name (“examples”), this folder contains some official extensions, that are maintained together with the base package.
The idea is that if you’re not happy with one of them, or need some extra features, you can simply copy these files to your project and modify them as you see fit. Of course, you can also use loaders or other extensions made by other developers.
Camera
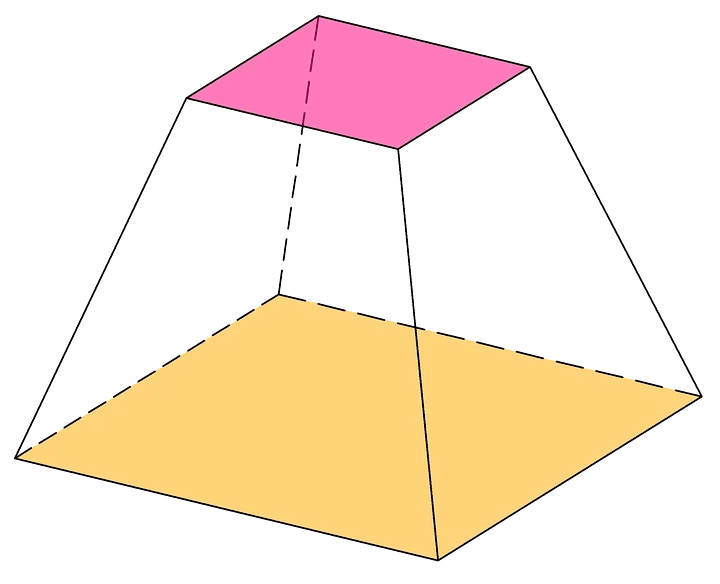
A camera is like a window to our scene. Without a camera defined, we simply see nothing. When defining a camera we create what is called a “frustum” — a mathematical term for a four-sided rectangular pyramid with the top cut off.
const perspectiveCamera = new THREE.PerspectiveCamera(
  50, // fov — Camera frustum vertical field of view.
  width / height, // aspect — Camera frustum aspect ratio.
  1, // near — Camera frustum near plane.
  2000 // far — Camera frustum far plane.
);
There are multiple types of cameras in three.js, but the two most useful ones are the perspective camera and the orthographic camera.
Perspective camera — In this mode, depth perception is emulated in order to reflect the way the human eye perceives the world. For example, if one cube is positioned closer to us than the other, it will appear to be larger. This is the most common camera you’ll probably use.
Orthographic camera — With the orthographic camera, there is no depth perception, so no matter where the object is placed in the scene, it will look the same size. This is useful for isometric games, for instance.
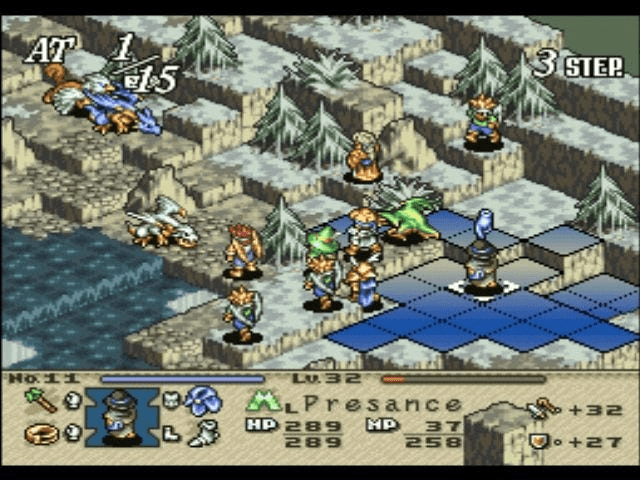
An isometric video game using an orthographic camera
Lighting
Just like in real life, without lights, our scene would become pitch black.
Three.js has multiple built-in light sources we can use and even combine to create the perfect setting.
It’s worth noting that some light classes support casting shadows, while some don’t, and it depends on their physics. For instance, “Dynamic Light” is a light that gets emitted in a specific direction. This light will behave as though it exists infinitely far away and the rays produced from it are all parallel. A common use case for this is to simulate daylight. Since it’s a one-directional light, it can emit shadows.
The AmbientLight on the other hand is a light that globally illuminates all objects in the scene equally. Since every spot in the scene receives the same amount of light, AmbientLight can’t be used to cast shadows.
When defining a light we would usually provide color and intensity.
const directionalLight = new THREE.DirectionalLight(0xffffff, 1);
directionalLight.position.set(0, 2, 10);
Lights can also come from external sources, like HDR files (An HDR is a 360-degree high dynamic range image wrapped around a 3D model.)
Shadows
Casting shadows is a pretty expensive calculation, so in three.js it’s turned off by default. In order to support it we will need to:
A. Turn on shadow support for the renderer (see next section about what a renderer is). We will also need to provide a type of shadow map, each provides a little different effect and calculation efficiency. See the details here under “Shadow Types”.
renderer.shadowMap.enabled = true;
renderer.shadowMap.type = THREE.PCFSoftShadowMap;
B. Tell each individual mesh if it should emit and/or receive shadows.
cube = new THREE.Mesh(geometry, material);
cube.castShadow = true;
cube.receiveShadow = true;
C. Allow the light source to cast a shadow. We also should provide the shadow map size and bias, which modifies the shadows pixelation.
const spotLight = new THREE.SpotLight(0xffffff, 1);
// make it cast shadows
spotLight.castShadow = true;
spotLight.shadow.mapSize.width = 1024;
spotLight.shadow.mapSize.height = 1024;
spotLight.shadow.bias = -0.0001;
Renderer
The render class is used for… well… rendering all of the scene components into the canvas element. This one is pretty straightforward.
// define the renderer
  renderer = new THREE.WebGLRenderer({ antialias: true, alpha: true });
  renderer.setPixelRatio(window.devicePixelRatio);
  renderer.setSize(window.innerWidth, window.innerHeight);

  // append the rendered to the dom
  document.body.appendChild(renderer.domElement);

  // render the scene
  renderer.render(scene, camera);
You will need to provide the desired canvas size using the setSize property, and the pixel density of the device. Note that in a case where the size of the canvas is responsive and depends on the page size, we should update the renderer and camera on window resize.
function onWindowResize() {
  camera.aspect = window.innerWidth / window.innerHeight;
  camera.updateProjectionMatrix();
  renderer.setSize(window.innerWidth, window.innerHeight);
}
Animating
More often than not, we’re not going to use three.js just to render one static 3D image. We would want the user to interact with the scene or create animations. To make three.js re-render the canvas, we would need to call renderer.render(scene, camera); each time.
If our changes are frequent, however, for instance when we add an auto rotation effect to our scene, we can simply do something like this:
function animate() {
   // Schedual the next update
   requestAnimationFrame(animate);
   // Some other changes that should occur on animate
   // for instance, here we can rotate the cube a litle on every frame
   cube.rotation.x += 0.01;
   cube.rotation.y += 0.01;
   // re-render
   renderer.render(scene, camera);
}
animate();
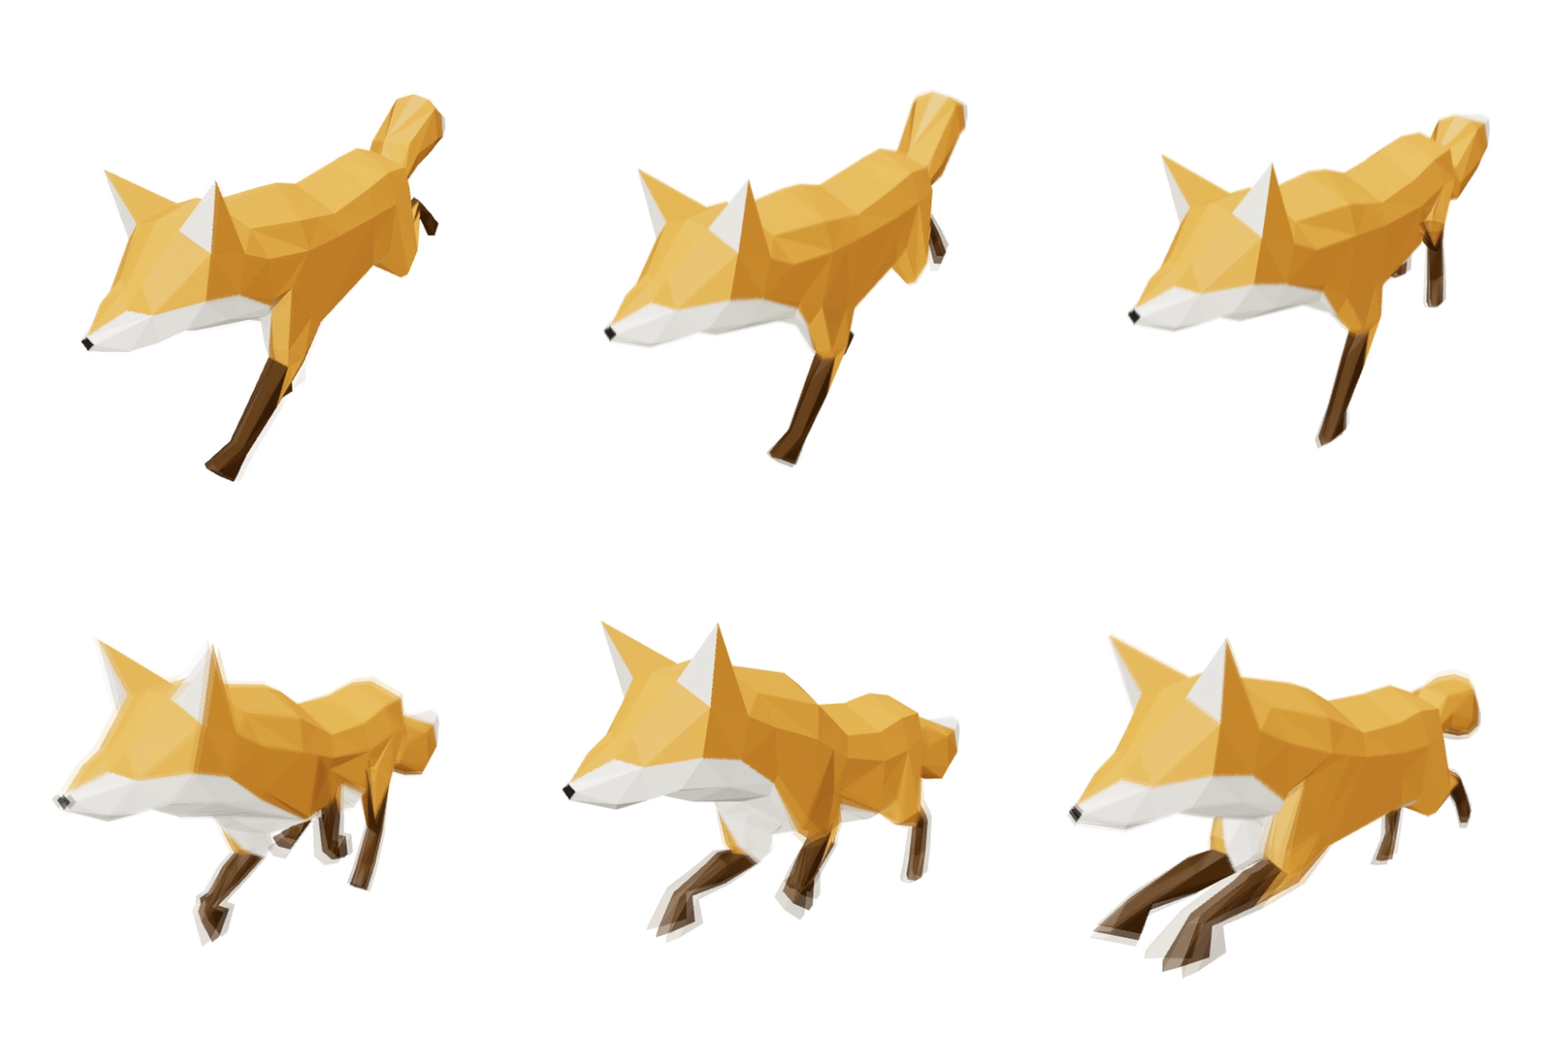
This is also required to support loaded 3D files which come with their own animation.
Camera controls
Camera control is another type of extension that adds a layer of interactivity to our scene, allowing the users to zoom in and out, rotate the scene or even navigate within it.
Let’s take as an example one of the more common camera controls: the orbit controls, which just by defining them lets the user rotate and zoom into the scene.
const orbitControls = new OrbitControls(camera, renderer.domElement);
Orbit controls have some other neat features out of the box, like adding autorotation to the scene.
Note that you will have to add orbitControls.update() to your animate function in order to support it.
Mouse events
Three.js essentially rendered a canvas, and as such, picking up mouse events is trickier than what you might be used to.
So what happens if you need to track clicks or hover over a 3d object? That’s what the Raycaster class is for. Raycasting is used for working out what objects in the 3d space the mouse is interacting with.
Here’s a basic example of how to pick up clicked on objects:
 // Raycaster
  const raycaster = new THREE.Raycaster();
  const pointer = new THREE.Vector2();

  function intersect(pointerPos) {
    raycaster.setFromCamera(pointerPos, camera);
    return raycaster.intersectObjects(scene.children);
  }

  window.addEventListener("click", (event) => {

    // calculate pointer position in normalized device coordinates
    pointer.x = (event.clientX / window.innerWidth) * 2 - 1;
    pointer.y = -(event.clientY / window.innerHeight) * 2 + 1;

    // calculate objects intersecting the picking ray
    const intersectedObjects = intersect(pointer);

    if (intersectedObjects.length > 0) {
      // do something with the objects our mouse intercted with
    }
  });
And a demo, so you can see it in action:
And that should cover all the basics. Hopefully, three.js makes a little more sense now!
Extra read
https://discoverthreejs.com/ — An amazing free online three.js book and guide. A great resource to learn from. https://threejs.org/examples — the three.js documentation is not beginner-friendly, but it does worth using the examples section to get ideas and learn about more complex topics.
